Proxmox
Proxmox Helper Scripts

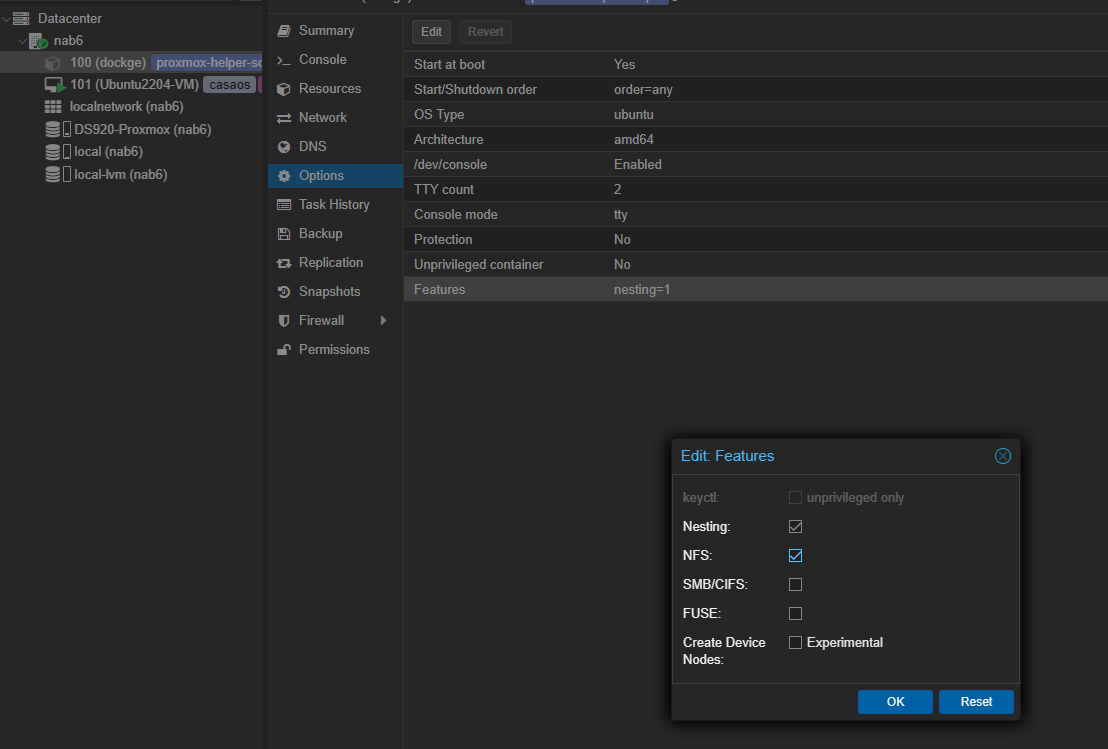
Mounting NFS shares (NAS Shares)
in case you run a Proxmox CT container und need to give it access to NFS (and SMB if needed)
it need to be a priviliged container
(just doubleclick on Features and enable it on a stopped/Shutdown Container)
Use my Script
- Go to home directory
cd ~ - create the mount_nfs.sh
- copy the contents from mount_nfs.sh and ad it
Ctrl+X Y Enter to save it
 - make it executable
- run it
Do it manually
If that didnt work, ChatGPT gave me this, and that worked always
-
Update Package Lists:
-
Install NFS Client:
-
Create Mount Point:
- This command creates the directory
/mnt/DS920_docker.
The-pflag ensures that the command doesn't throw an error if the directory already exists.
- This command creates the directory
-
Mount the NFS Share:
- This command mounts the NFS share located at
192.168.1.222:/volume1/dockerto the local directory/mnt/DS920_docker.
- This command mounts the NFS share located at
-
Check the Mount:
- Verifies that the NFS share is successfully mounted. You should see it listed among the mounted filesystems.
-
Automount on Boot (Optional): To ensure the NFS share is mounted automatically on system boot, add an entry to the
/etc/fstabfile. Open the file using a text editor (e.g., nano):
Add the following line at the end:
Save and exit the text editor.
- Unmount NFS Share (If Needed): To unmount the NFS share, use the following command:
Now, your Synology NAS NFS share should be successfully mounted to /mnt/DS920_docker on your Debian Proxmox CT.
If you added an entry to /etc/fstab, the share will also be mounted automatically upon system boot.
My fstab looks like this
# UNCONFIGURED FSTAB FOR BASE SYSTEM
192.168.1.115:/nfs/MediaHub_PR4100 /mnt/PR4100_MediaHUB nfs defaults 0 0
192.168.1.222:/volume1/docker /mnt/DS920_docker nfs defaults 0 0
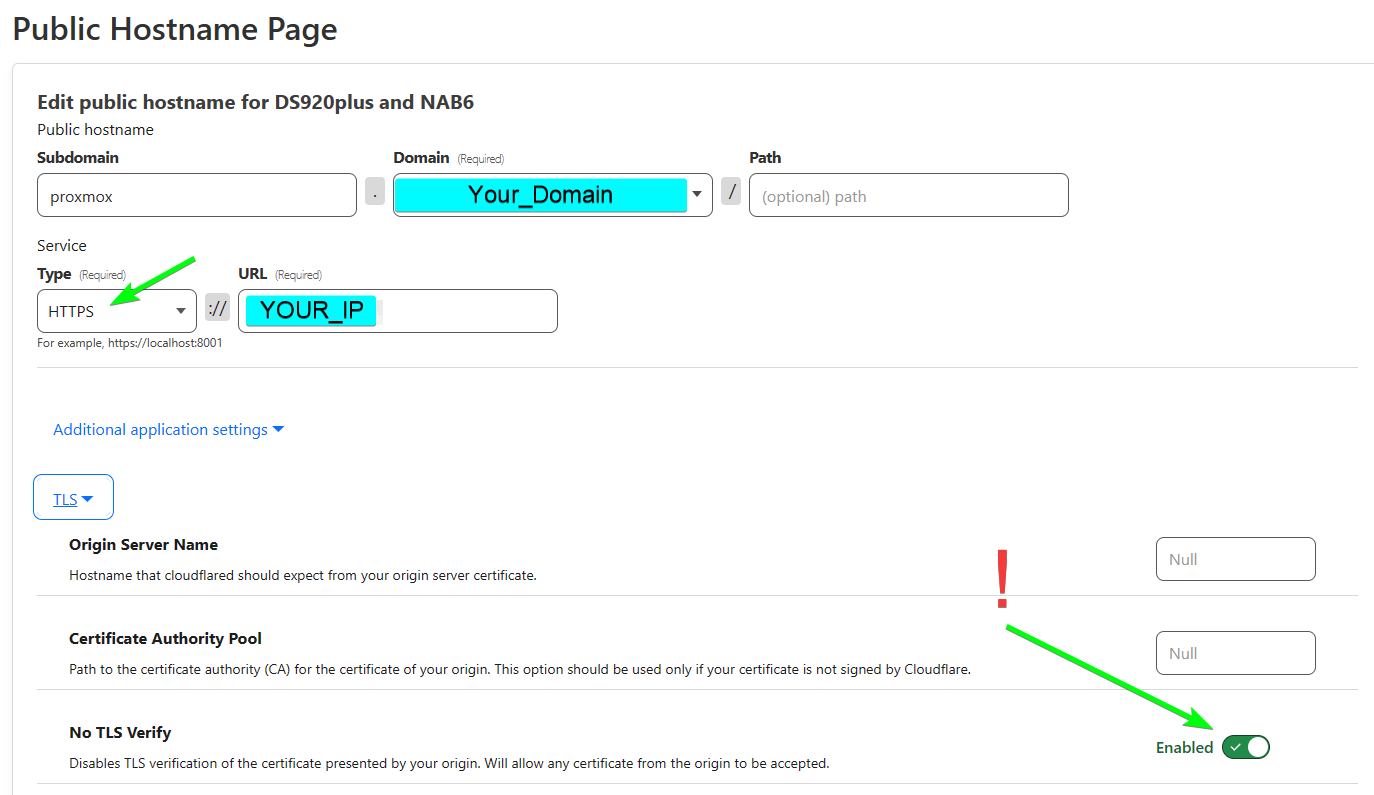
Access Proxmox via Cloudflare Tunnels
Make sure No TLS Verify is checked
Grow File Size
Resize (add storage) in the Hardware Section, then
Hardware Harddisk Disk Action Resize
Then open the console and type
And then allocate it with